Showing posts with label house1. Show all posts

Monday, August 22, 2016

Kitchen Update : Little Changes

Sometimes, making a small change can make a big impact.  As most people know, kitchens are usually considered the most expensive renovation in a house!  Adding up the cost of appliances, counters, cabinets, flooring, lighting...it can really add up quickly.

Since a kitchen renovation isn't really in our budget right now, I've been making small changes that are making a big difference.  While these haven't been free upgrades, I've spent around $125 and about an afternoon making these improvements!  I think that they've made a big difference in our kitchen, and make it feel more like it's our style.


Clean - $0 - 2 hour

This might not be as fun as going shopping and making visual changes, but cleaning can make a huge impact on a space!  When we moved in, the cabinets were pretty grimy and dingy, the white floors (btw- NEVER get white floors in a kitchen!) were dirty, and the appliances looked used.  I spent a few hours cleaning everything and it made such a big change!

On the cabinets, I used a basic cleaning spray, and thoroughly cleaned the inside and outside.  I also took out all of the shelves (this is easiest when you first move in and don't put anything inside yet) and used a shopvac to get out any crumbs.

I love using CLR to clean appliances.  I used some to clean the inside of the dishwasher, as well as all of the stainless steel.  It made everything look so shiny and almost new when I was done!

When I got my first apartment, one of my first purchases was a basic Swiffer.  I use both dry and wet cloths all the time and love how simple they are to use.  I don't think the fancy models are necessary- basic works just fine for me!


Changing cabinet hardware - $56 - 1 hour

While I didn't hate the knobs that came with the kitchen, there were some big problems with them.  Not only were some knobs missing, but others were loose and would occasionally fall off when I would open a drawer.  Not the look I'm going for!

The house came with these basic silver knobs.  

I feel like this changes the look completely!  I love the modern black knobs!


This was another easy fix to make.  I found knobs that I liked at Target in a multi-pack, and spent an hour removing the old knobs and replacing them with the new ones.  This was really easy, and all you need is a screw driver!  When I had all of the knobs off, I spent time to clean the cabinets again (to get that space under the knob, which was pretty gross!).

I couldn't believe how much this changed the look of the kitchen!  I absolutely love the look of the new knobs, and didn't have to use any power tools or put in much work at all.


Accessorize - $70 - 15 minutes

Finally, an easy way to change up the look of a kitchen is to add in some accessories and inject your own style.  Since I spend a lot of time cooking (and then washing dishes), I wanted a comfortable rug to stand on.  I found this one at Target, and loved the flowery design that matched perfectly with the white walls.  


I didn't go too crazy with decorating, since I don't have a lot of counter space, and wanted space to actually prep food!  I bought canister jars at Marshalls to hold some dry ingredients (I use it for flour, sugar, rice and salt).  These were really cheap, and came in less than $15 total!  You can find similar ones on Amazon, but I would recommend checking out Marshalls or Homegoods first. 


Behind the jars, I layered a marble slab that I use for serving food.  I picked this one up at Target a while ago, and loved that I'm able to display it now!  I re-used a few other decorations that I had lying around, like a bud vase and fake flowers to brighten up the room a bit.

Beside that, you can see the spice racks that I got from Ikea.  This was a DIY project to match them with the rest of my decor, and now I love how they look.  I'm thinking about eventually mounting these to the wall, but for now they work fine resting on the counter.


Here's a before and after of the kitchen.  It still looks pretty similar, but I think these small changes made it look a lot better.  What do you think?


There are a few other projects that I want to do to the kitchen, but for now I love how it's looking! It's easy to make a few small changes that make a big impact on the room.  Here is my progress from my original kitchen plans post!

- Install under-cabinet lights : This is something that Dan requested, so I'll be adding these ASAP!

- Replace cabinet knobs

- Replace faucet : This is another quick and easy way to change up the look of a kitchen!

- Add back splash :  Right now there's no back splash in the kitchen, so I would love to add some.  I'm still deciding on the style and type that I want, so this won't happen right away!

- Organize

- Add some greenery : I have plans on adding in some more, and I can't wait to see how this turns out!

- Change lighting : This isn't something that was originally on my list, but I really want to replace the lights in the kitchen.  I liked them at first, but now that I'm making upgrades I'm not feeling them. 

post contains affiliate links linking up with Amanda

Thursday, July 7, 2016

Home Plans : Bathroom

We finally made it to the final room in the house!  If you haven't seen the other home tours, you can find them all here, or look at the living room, kitchen (and eating area), office, and basement.  Today we're going to be talking about the bathroom!

To be honest, there's not much that I want to do with this space.  It's a really small bathroom, and everything is in good shape!  I want to make some cosmetic changes, but for the most part I'm fine with how this looks.  As usual, I'll be sharing "before" pictures, projects I want to do, and some inspo!


Before

As you can tell, this is a tiny bathroom.  It was really hard to get pictures of everything, so just imagine a big white tub/shower on the other side of the toilet and sink.

Project number one was replacing the burnt out lightbulb!

Thankfully, there's a huge closet in the bathroom!  Even though it's a tiny space, there's plenty of room for toiletries and other bathroom supplies.  This is beside the tub.


Projects

- Paint.  I'm not really a fan of the brown color (plus we already did some work and messed up the paint on one wall, so this is a necessity!).

- Add a medicine cabinet.  Right now there's just a mirror with a shelf, so I would love to add a medicine cabinet to increase our storage.

- Accessorize.  I want to add some open shelves above the toilet, and decorate the bathroom a bit!  It's looking really brown and boring right now, so this should make it look a bit better.

- Organize the closet.  It's such a mess right now, so I need to figure out a storage system!  Hello, Container Store!


Inspiration

source
Doesn't this look like a spa?  I love how simple but effective the storage is.

 
source

Such a simple, clean design.  I think this could work!


Who else has a tiny bathroom?  Any suggestions?
Which inspiration pic do you like better...1 or 2?

linking up with Amanda and What's New With You! (go check out my other blog!)

Thursday, June 23, 2016

Home Plans : Basement

After a bit of a blogging hiatus and lots of house work, we're back to the "before" home tour!  We're almost out of rooms, but today we have a really exciting one...the BASEMENT.

One thing that I really wanted when we were looking at houses was a finished basement.  When we were touring this house, I liked all of the rooms and the location.  Then, our realtor took us down to the basement...and I was completely sold.  Half-finished, separate (unfinished) area with all of the utilities, and an attached garage?  SOLD!

Today I'll be sharing some plans I have for this space, along with pictures and inspiration!


Before

 This door leads to the unfinished area (and all of our utilities/washer/dryer!)

 Hey- another fireplace!  This one is just decorative though.

Note the weird cubby on the left..we'll be talking about this below!


Projects

- Add a (half) bath.  The house currently only has one bathroom, so I think even adding a small half bathroom in the basement would be a huge improvement.  I'm hoping to also add a standing shower if we're able!  I do want to make it a little room where our utilities are, and definitely do NOT just want a Pittsburgh toilet.

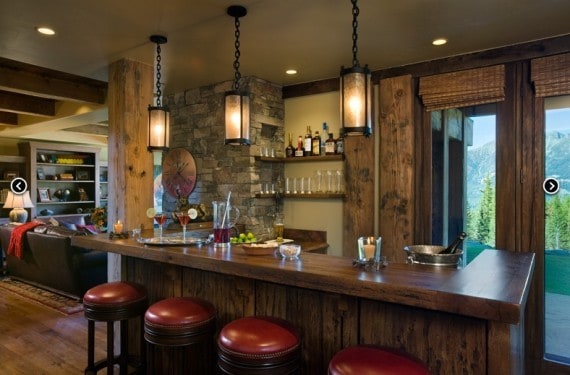
Add a bar area.  We have a decorative fireplace that takes up one corner of the room, and Dan came up with the idea of building a bar in that area.  I have an image in my mind of what I want this to look like, so I'm hoping that I can really make it happen because it's going to be AWESOME.

Make a workout corner.  There's a weird corner of the room that would be perfect to add some shelves and organization for all of my workout gear (the cubby pictured above!).  Right now, I have everything thrown in that corner, so I need to do something to make it look neater and keep everything organized!

- Add some COLOR!  As you can tell from the picture, this is a very brown room.  Brown carpet, brown walls, brown fireplace.  I want to add some color so it doesn't look so dead and monotone!


Inspiration


source
I think this would look perfect for our workout area!  I love the bright cabinets and open shelving, so I can store some items and display others. 

source
I like the layout of this bar, and think this could work with what we have.  I would change up how the bar looks, but I love the stone mixed with wood!


Thanks for stopping by!  One more room to come, then we can start getting into projects and more fun!

Wednesday, May 25, 2016

Home Plans : Spare Bedroom / Office

This is probably the room that I'm most excited about!  I've never had a spare room in any of my places before (I've always had one bedroom apartments), so the opportunity to make this my own is really exciting to me.

This house has two bedrooms that look the exact same (the "master" is a tiny bit bigger).  I'm not going to be sharing a separate post on the bedroom, because I'm not changing much about that room.  The "before" pictures all look the same, so I'll just share the room once it's done!

Right now, the room is kind of boring.  It's small and has yellow walls and a closet.  This is currently where we're storing a lot of things until we get it all organized, so it's definitely the room that needs the most work!  Here are some "before" pictures, the projects that I want to do, and some inspiration for what I want the room to look like.

Before


Projects

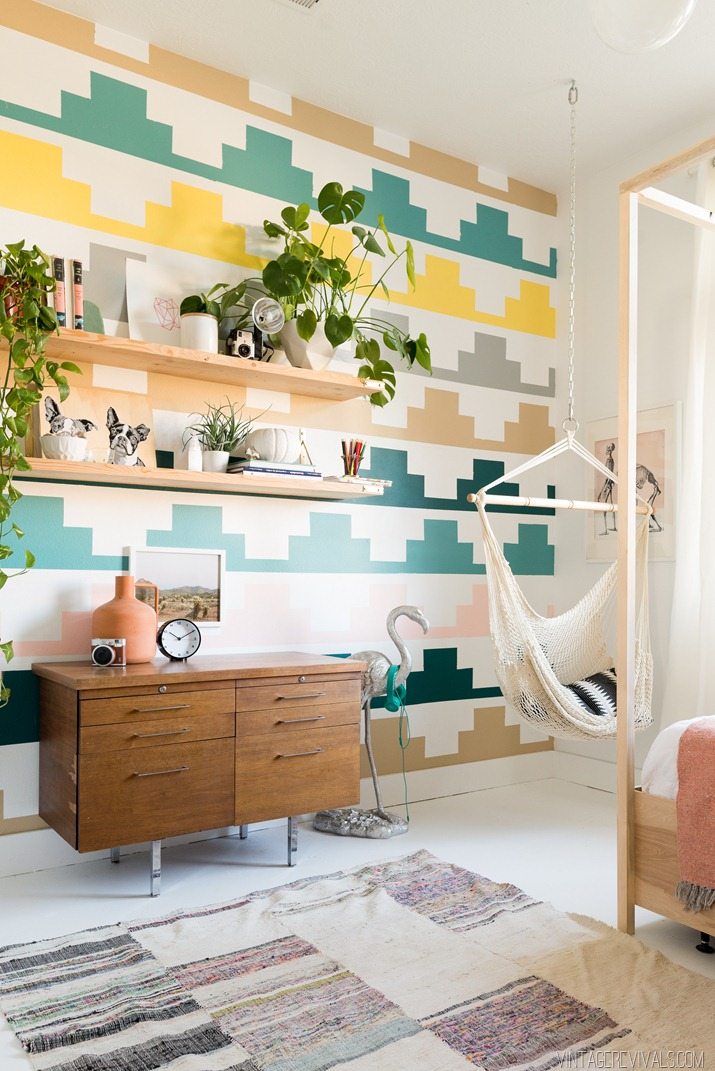
-Paint.  I'm not a fan of the yellow color, so that will be one of my first jobs!  I'm thinking about having a neutral color with one statement wall.  This is where I really want to get creative!

-Add storage.  Right now, I have a few mis-matched bookcases and other shelves that look really cheap.  I want to have a good storage system that integrates with a desk so that I can finally have a work station at home!

-Find a good sofa bed.  Since this will also be our guest room, we need to have some kind of a bed.  I'm hoping to find a reasonably priced sofa bed that is actually comfortable!  If anyone has suggestions, I would love to hear them.


Inspiration

source
I love this wall!  It looks really cute and fun.  Mandi always makes incredible rooms, and she outdid herself with this one!


source
This is exactly what I'm thinking in terms of organization!  How amazing and inspirational does this look!?  This just makes me want to get to work right now.


linking up with Amanda

Thursday, May 12, 2016

Home Plans : Eat-in Kitchen

Hi everyone!

The last room that I showed you all our kitchen, and now I'm going to be sharing the dining area.  We have no official dining room in this house, but there's a blank space between the living room and kitchen which is just enough space for an eat-in kitchen!

To be honest, Dan and I rarely actually eat at a table (usually on the couch..guilty), so I doubt a dining room would be used very often.  This space is just big enough for some storage and seating, so I'm excited to get creative and make the most of the space!!  Here's what I have planned:

Before


This opening goes to the living room, and where I'm hoping to add the drink bar (which I'll talk about below)

A view from the other side!  The kitchen is on the other side of the door (which leads out to the back deck)

Not very big, but plenty of room for fun projects!  Here's what I have in mind:


Projects


- Add a corner booth.  I think the best use of the space is to add a corner booth right beside the back door.  I have so many ideas on building this myself and I think it will be a great addition to the room!  The bench can also be used as storage for things like linens and special serving ware, so I think it's going to be very useful.

- Add a drink station.  This is probably the project that I'm most excited about in the entire house!  I have so many ideas right now about what I want and what I want it to look like.  I'm still not sure if I want this to be something that I build myself, or modify something that I can buy.  I've been getting lots of inspiration though, which you'll see below!

- Add some color.  I'm keeping the room blue, but besides that there isn't much color in this room.  The floors are gray, and the cabinets are white (I also want the coffee bar and drink station to be white so it's cohesive).  That means that I want to get creative and add in some color with things like rugs, cushions, and table decorations!


Inspiration

source
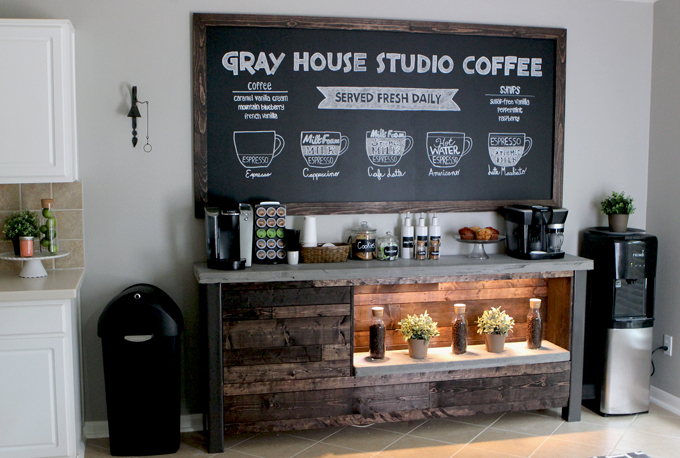
This is where I originally got the idea to add a drink bar.  This one is specifically for coffee, but I also want it to be used as an actual bar!  How amazing does this look though?!

source
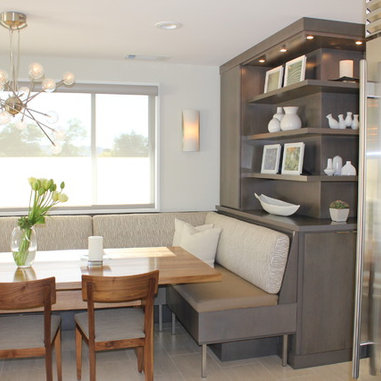
I love how modern this corner booth looks!  It's nice and simple, and I love the built-ins above the seat.  Sleek and functional!

source
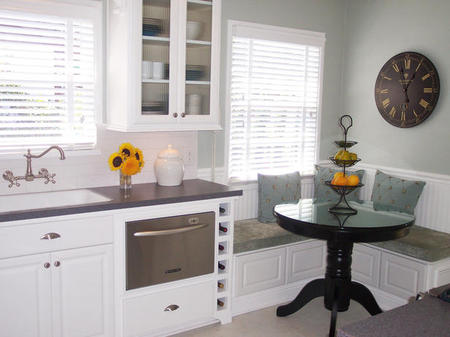
 I really like how the counters blend into the corner seat, and I could see this working in my space!  I could have a corner seat attached the the drink bar.  Love this design!


Check out my other room plans here!
linking up with Amanda
Tuesday, April 12, 2016

Home Plans : An Overview

Hi Everyone and Happy Tuesday!  Today I'm going to be kicking off the home posts on this blog by giving you an overview of my new house (!!! still pretty excited to say that !!!).  Starting next week, I'll be going room-by-room through the house giving you some "before" pictures, project ideas and timelines, and some mood boards.

Here's a little snapshot of some home specs:
- built in the 1940s
- brick ranch
- 2 bedrooms, 1 bathroom
- half-finished basement
- 1/2 acre of land
- about 900 square feet

In general, I think this is a great starter home.  Dan and I both wanted to live in a particular suburb of Pittsburgh, have some land, and have access to public buses.  We also preferred to have a smaller house so that it's less maintenance (and cheaper), have a built-in garage, and situated on a quiet street.  This house checked off all of those boxes, so we were really lucky to find it!

Here's a look at the general floor plan and lot.  Please excuse my Paint skills, but hopefully you get the gist of the house. (to make it bigger just click on the image)


Even though this is a smaller house, there are lots of closets, a large basement, a fenced-in area for Selma to run around, and a big deck in the back.  What more could I ask for?


I'll see you later this week for some design inspiration, and next week for the first room breakdown!